How To Use an Angular Torque Gauge
Overview
The ToolPRO 1/2" Drive Angular Torque Gauge is a specialist tool from our range of torque gauges, often required in engine rebuilding.
Items
Tools
- Breaker Bar
- Socket to suit your fastener
- Small Extension if needed
- Angular Torque Gauge
Steps
Check Specfications
Start by checking the specifications for the bolt you are looking to tighten.

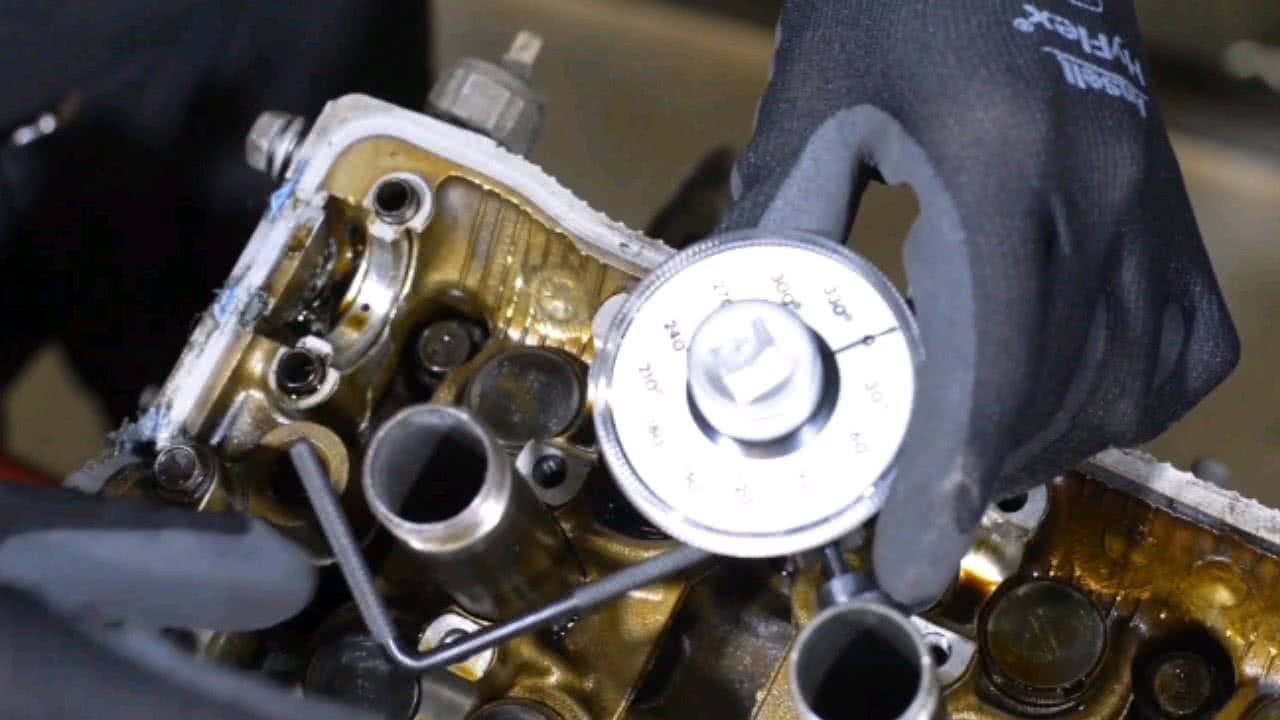
Position the Socket
With the socket attached to the torque gauge, position the socket on the fastener.
Brace the adjustable arm against an existing nut or fixture, or in a bolt hole to prevent the gauge from moving.
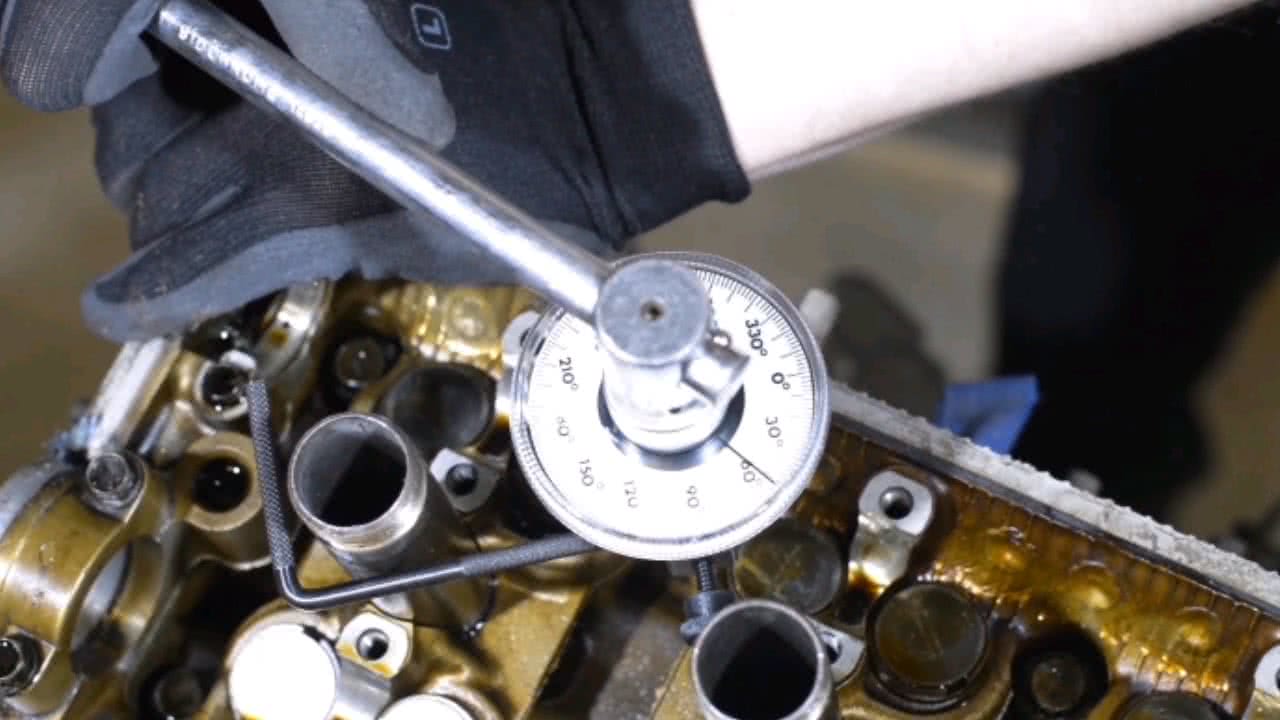
Tighten the Fastener
Now, with the breaker bar inserted in the top of the gauge – tighten the fastener until the needle reaches the desired setting.
Thats it! Simple!
*Important information* - Click here to read more about our How-To terms and conditions.