How To Repair a Chipped Windscreen
Overview
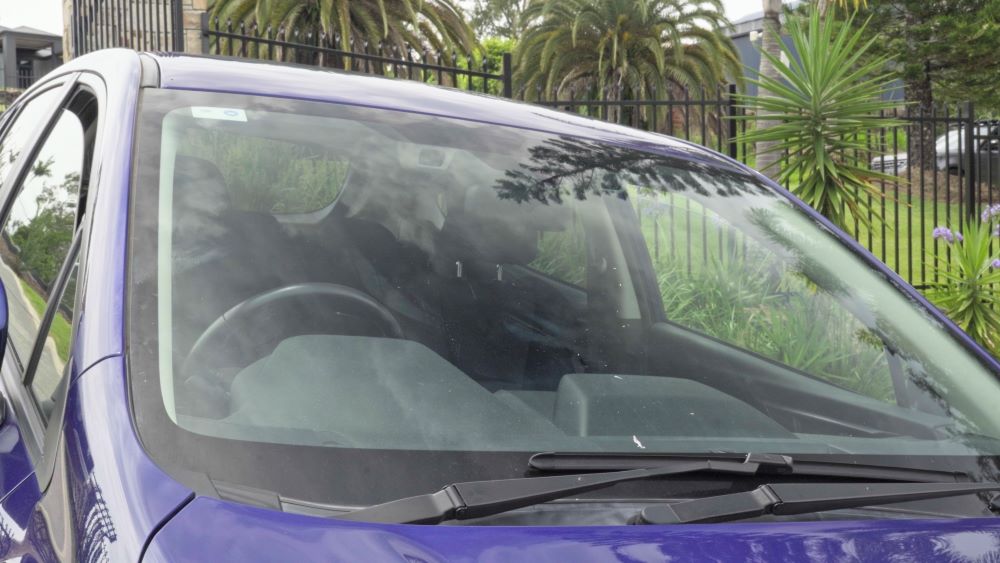
A cracked or chipped windscreen doesn’t have to mean an expensive windscreen replacement. Depending upon the severity of the damage, you may be able to fix windscreen chips yourself at home with a windscreen repair kit, here we have x2 versions of a windscreen repair kit, in this video we'll be using a Rain-X windscreen repair kit, for the U-Fixit version please refer to the instructions located within the product packaging. Let’s take a look at how to repair a windscreen.
Can I Repair windscreen chips without replacing glass?
Many windscreen chips can be repaired without replacing the glass. Some chips or cracks are too large to be repaired. Certain types of chips and cracks may also be unrepairable when they interfere with the drivers line of sight. Finally, some modern vehicles with advanced driver assistance functions incorporate this technology into the windscreen, which may cause it to be unrepairable.
How to fix small chips in car windscreen
Before attempting a windscreen chip or crack repair; the damage should meet a few criteria. For chips, stars, and bullseyes the damage should not exceed 25 millimeters diameter.

In the case of a crack, the crack should not exceed 100 millimeters in length; nor reach the edge of the windscreen in more than one place. But please refer to the instructions in your kit as it may vary between brands.
Step-by-step guide to using a windscreen repair kit
An effective windscreen repair will take approximately half an hour and requires only a few basic items.
Items
Steps
Prepare the area
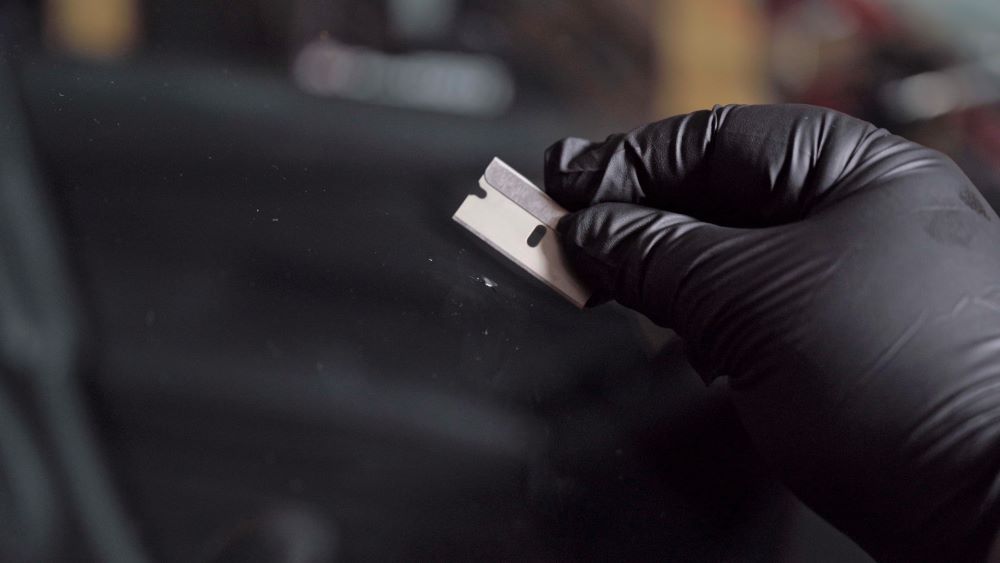
The repair resin is activated by UV light, so park up in the shade until it’s time to cure the repair. For chips, bullseyes & stars open your windscreen repair kit and grab the included razor blade, use this to clean up any loose glass fragments.
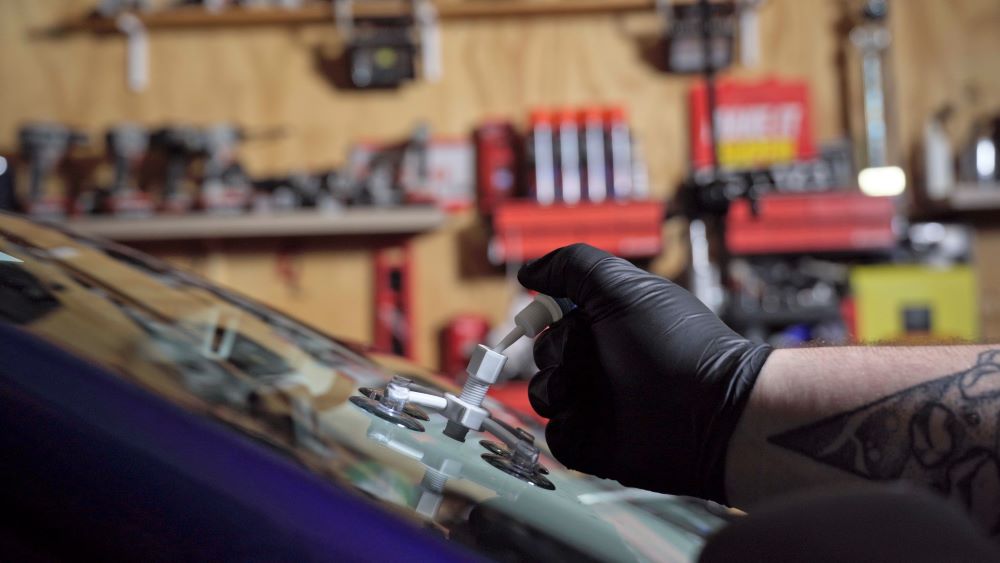
Assemble the windscreen repair kit
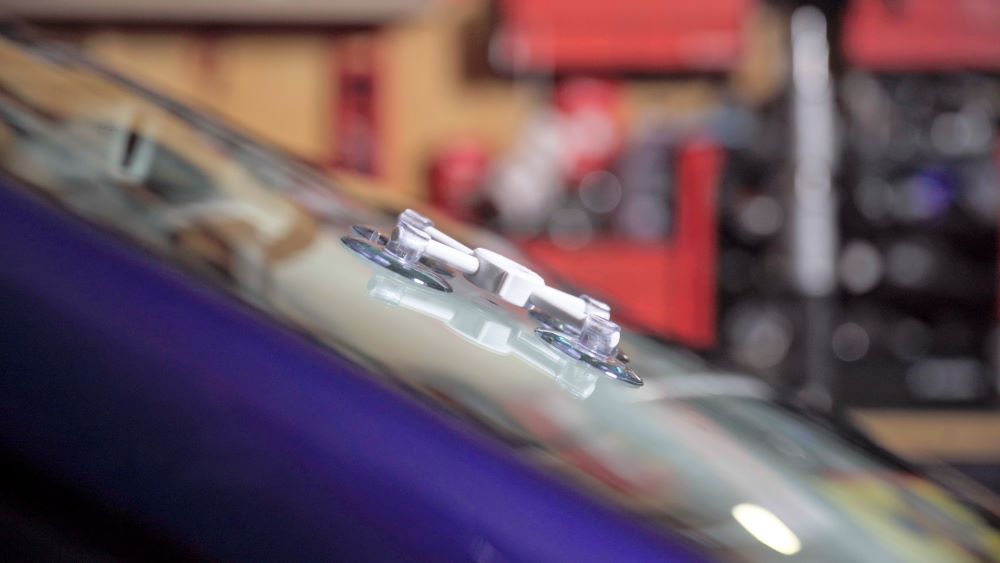
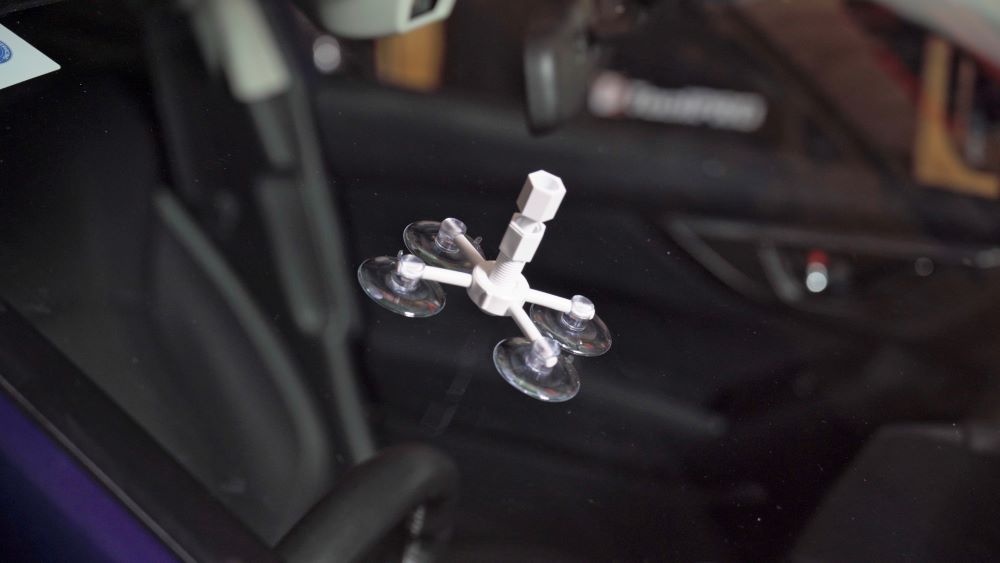
Fix the applicator base to the windscreen aligning the centre ring above the impact point of the windscreen chip, make sure the centre ring is not touching the windscreen. The suction cups should not cover any part of the windscreen damage, their position is adjustable if required.
Once you’re satisfied with the location, give the applicator base a gentle tug to ensure it is firmly seated.
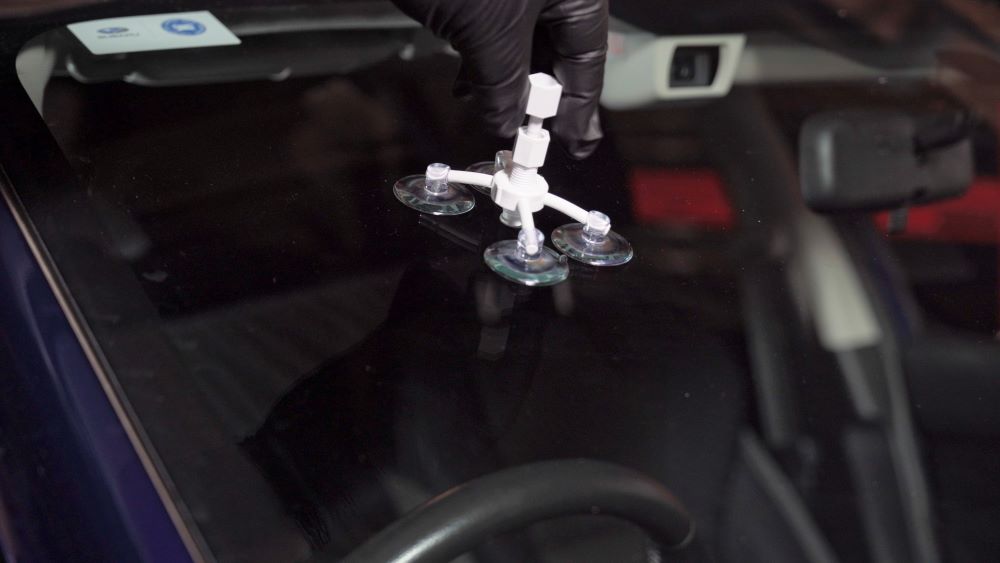
Fit the resin chamber
Now thread the resin chamber through the centre ring until the rubber tip contacts the glass. Do not over tighten this, as too much pressure will deform the glass damaging the windscreen further and making it harder for the resin to penetrate. Take a look from inside the vehicle to ensure the rubber tip is centred over the impact point, if necessary re-maneuver the device to ensure the rubber mouth is directly on top of the centre of the crack.
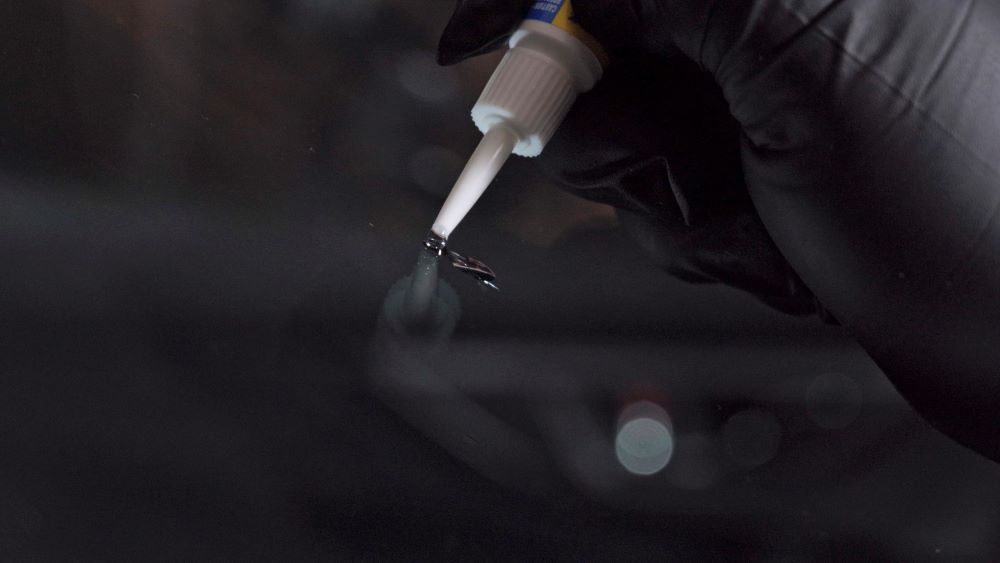
Apply the resin
Slice the top off the rounded tip of the resin bottle using the razor blade and squeeze three to six drops of resin into the resin chamber. If you spot a leak; very gently tighten the resin chamber clockwise just enough to prevent further leakage.
Now thread the pressure driver into the resin chamber. This will force the resin into the damage and from inside the vehicle you should see an immediate improvement in the appearance of the chip. If you notice any leaking, once again tighten the resin chamber until it stops.
If after 6 minutes the resin hasn't completely filled the damage, you may be able to apply more heat on the INSIDE of the windscreen with a hot air gun or hair dryer and then slightly re-tighten the pressure driver to push resin further into the break. Use caution when applying heat as excessive heat may cause further damage.
Release the air
Unscrew the pressure driver from the resin chamber to release any trapped air in the chamber. Re-insert the pressure driver and screw down again to displace any air remaining in the break. To determine if the repair resin has been absorbed fully into the break, look at the glass from about a 45 degree angle, make sure no air bubbles remain in the break. In the case of chips or bulls eyes, examine the glass from directly behind the damaged area, un-repaired damage will show as dark green or black areas. If there is damage still visible, repeat the previous x2 steps until you're satisfied with the results.
Cure the repair
Remove the repair assembly and be ready with a Clean lint free rag or cloth to wipe away any excess resin. Add a fresh drop of resin wherever surface damage is still visible, and then place a curing strip over the entire repair area. No need to apply it with force.
Move your vehicle into direct sunlight where UV light will cure the resin. 5 to 10 minutes should do the trick. If the resin is still wet under the strips, leave the strips in place until the resin dries.
Tidy up
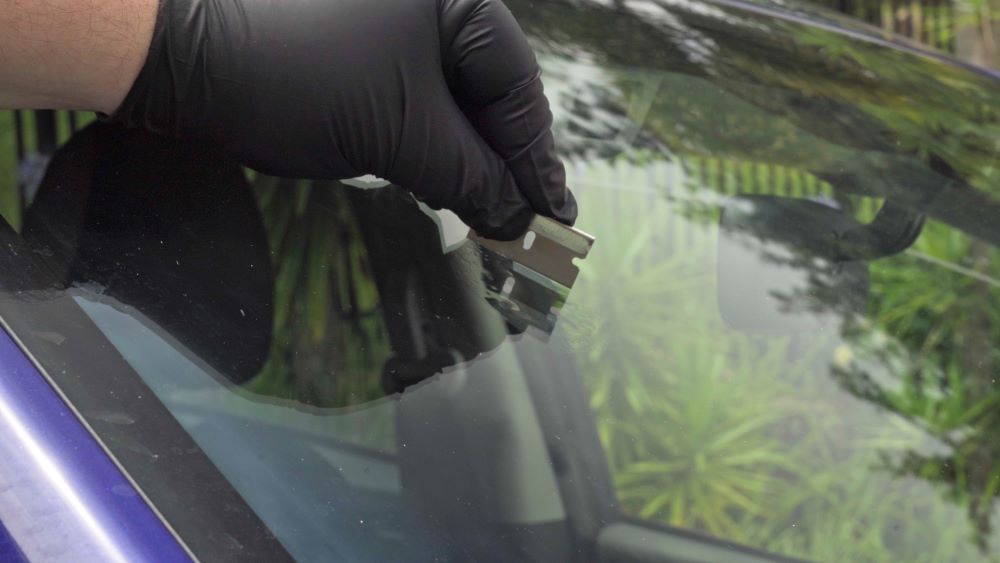
Holding the razor at 90 degrees to the glass, carefully scrape away the excess resin. Don’t be tempted to use the razor at 45 degrees, as this may lift the resin from the repair, and you’ll need to repeat the curing process. If a blemish still remains on the impact point, apply a small drop of repair resin directly on the chip, cover the area with a curing strip and gently scrap over the top of the strip to force the resin into the chip. When this cures, repeat step 7 to remove any remaining excess resin.
Tips
How do I prevent windscreen cracks from spreading?
If your windscreen has been chipped or cracked, the best way to stop it from spreading is to repair it as soon as possible. In the meantime, try to avoid extremes of temperature and driving on rough roads. Both of these can cause a crack to rapidly spread. Once you know how to repair a windscreen, a proper repair will prevent windscreen cracks from spreading.
How to repair a windscreen crack
Repairing a windscreen crack is different to repairing a chip. For starters, you won’t be using the applicator base, resin chamber, and pressure driver (unless it is directly at the impact point of the damage). Instead, very slowly dispense repair resin directly on the crack, start from one end and dispense resin only as fast as the crack disappears. Look at the crack from a 45 degree angle to observe any air pockets or missed areas. After 5-10 minutes, if any air pockets remain in the crack, gently apply a small amount of pressure from inside the windshield to both sides and centre of the crack, this will help force air out of the crack. Remember to apply pressure carefully and sparingly as excessive pressure will extend the size of the crack.
After all air has been removed, reapply the repair resin across the length of the crack and place curing strips on covered areas as you go. Be sure not to leave any air pockets under the strips and use as many as necessary until the crack is completely covered. Once done, move your car into direct sunlight and allow 10 minutes for it to cure.
Once the resin is dry remove the strips and scrape off any excess resin with the razor blade at 90 degrees. You should not attempt to repair a crack yourself if it extends over 12 inches ( or x cm's), extends to the edge of the windscreen in 2 places or is not on the outer layer of glass.
A windscreen repair kit could easy find a home in your vehicle tool kit for quick repairs on the go that could save you HUNDREDS.
*Important information* - Click here to read more about our DIY Advice Terms and Conditions.