How To Install a Trailer/Camper Van Battery
Overview
How easy is it to fit an auxiliary battery into my trailer or camper?
Modern caravans and camper trailers are loaded with the latest 12-volt technology. But owning an older model doesn’t mean you have to live in the dark ages! This article will show you just how simple it is to fit a battery system to any trailer.
There are three key components needed for a successful installation. A battery, a battery box – or secure way of mounting it; and a DC charger.
If you're looking to level up your knowledge, check out the other handy resources from our Battery Fundamentals series:
- The basics to dual battery systems
- The fundamentals of battery boxes
- The basics to VSR & DC chargers
- The fundamentals of battery chargers
- Guidance on how to wire a dual battery
- The fundamentals of how solar panels work
- All you need to know about battery maintenance
What is the best battery for a camper trailer?
When choosing a battery for your system, steer well clear of wet cell batteries. The gases released from a wet cell battery during charging make them unsafe for enclosed spaces. Instead, choose a GEL or AGM deep cycle battery.
An AGM 100ah (Amp hour) battery is a good starting point for running basic accessories and a fridge from your trailer. Mounting this battery inside a battery box is wise to avoid damage to the battery, or accidental shorting of the terminals.
What does Supercheap Auto stock?- VSR kits - If you have a battery installed for solar use, wy not have the vehicle charge it while you drive with a Voltage Sensitive Relay.
- DC to DC charger - Better yet, a DC to DC Charger with a Solar input is a great way to charge your battery using solar and the vehicles alternator in one handy compact unit.
- Battery boxes - Keep your deep cycle battery stored away in a battery box for peace of mind.
- Deep cycle batteries - If you're planning a dual battery setup, you're going to need a deep cycle battery that's designed to be drained.
- Solar panels - Keep your batteries charged without your vehicle running with a solar setup.
How do you recharge a trailer battery?
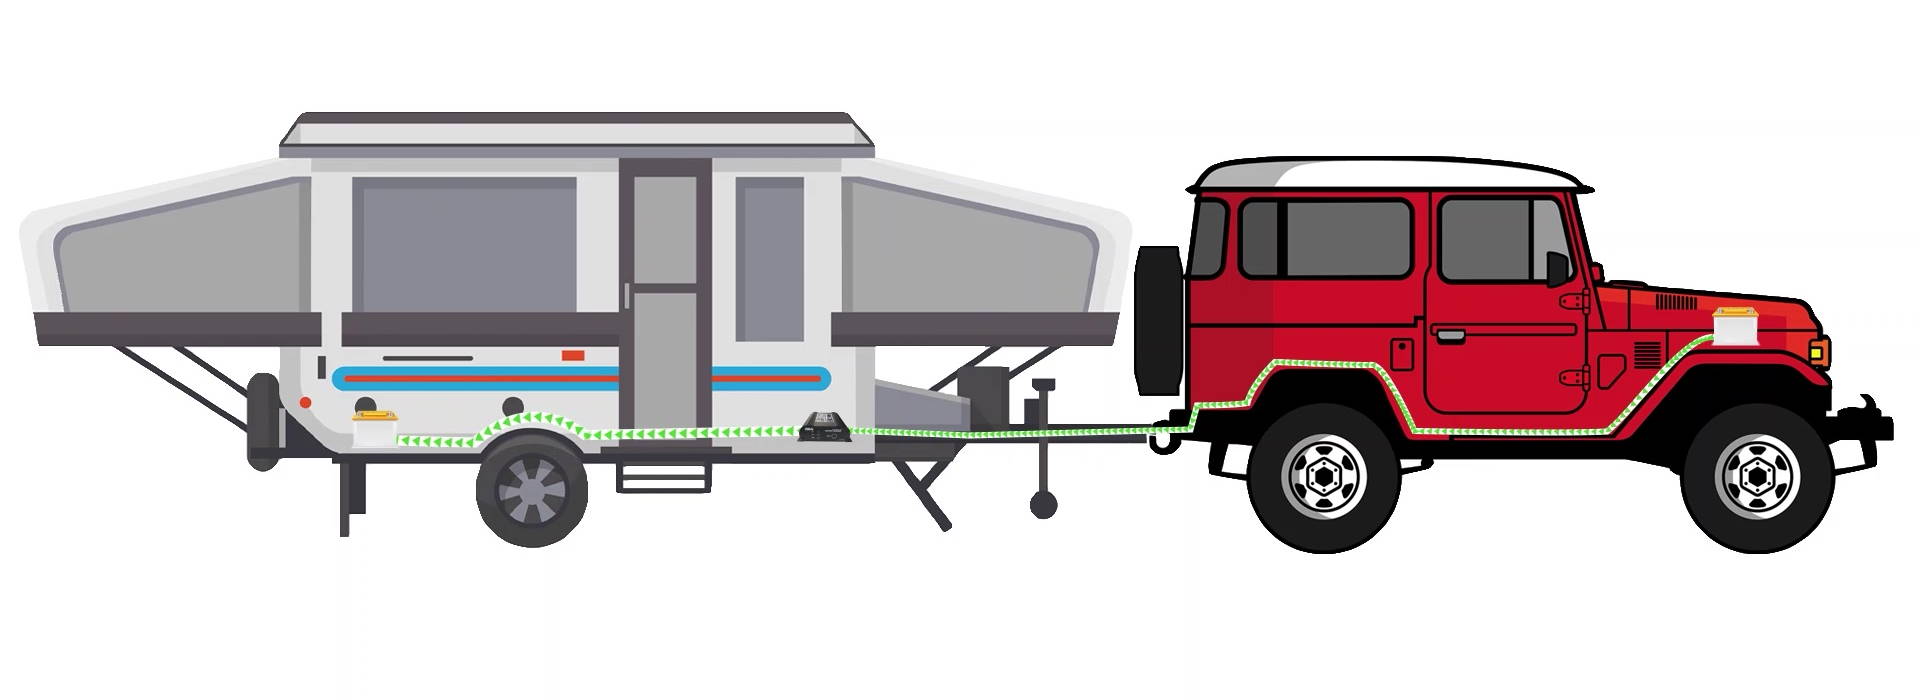
Finally, the DC charger. When placing a DC charger far away from the main battery when it should be as close to the main battery as possible, much thicker cabling is required to avoid voltage drop. Voltage drop is a leading reason why people return DC chargers as they experience this when using regular 50amp cable extensions. A DC charger can boost this voltage at the trailer battery. It uses preset algorithms according to battery type - to achieve a 100% charge.
For example: A charge of 13.8v from the alternator through 50amp or 8mm2 cable over 5m (5m x 2 positive and negative = 10m in total) back to the battery is a drop of 0.85v equalling 12.95v, before it gets to the DC charger. Most DC chargers will switch off at 12.5v or 12.8v making it very close to the switch point.
It is best practice mount the DC charger as close as possible to the mains battery, then run it out to the auxiliary battery with a suitable cable. The DC charger will compensate/increase the voltage required to charge the second battery. When grounding the DC charger to the chassis is a good way to reduce cable length and voltage drop. However, this may not be suitable for some newer vehicles as the chassis might be completely isolated from the mains battery.
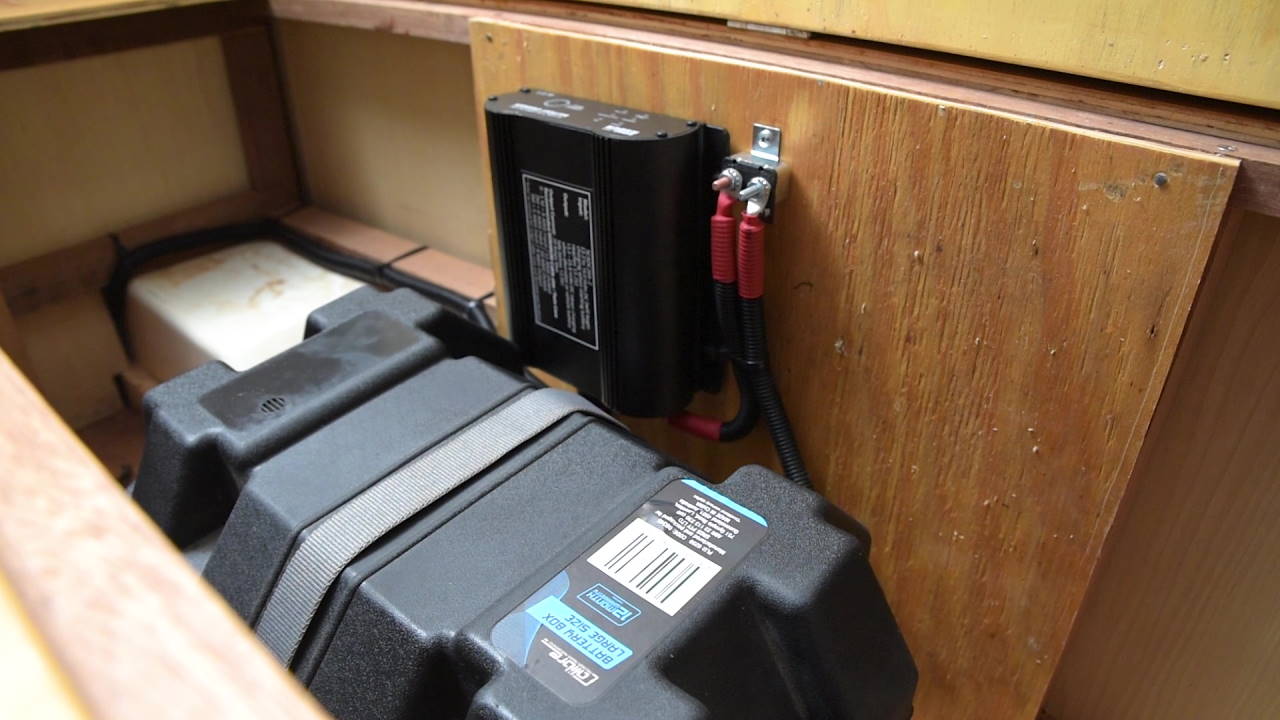
Once your battery is mounted, the DC charger should be installed as close to this as possible and fixed to a flat surface. Allow a little space around the unit for dissipation of heat, and never allow it to be smothered. To send power from your vehicle alternator to the charger – you’ll need to complete a simple Anderson plug installation. Pre-made cable with Anderson plugs and connectors can be purchased at Supercheap Auto.
How do I protect my trailer battery?
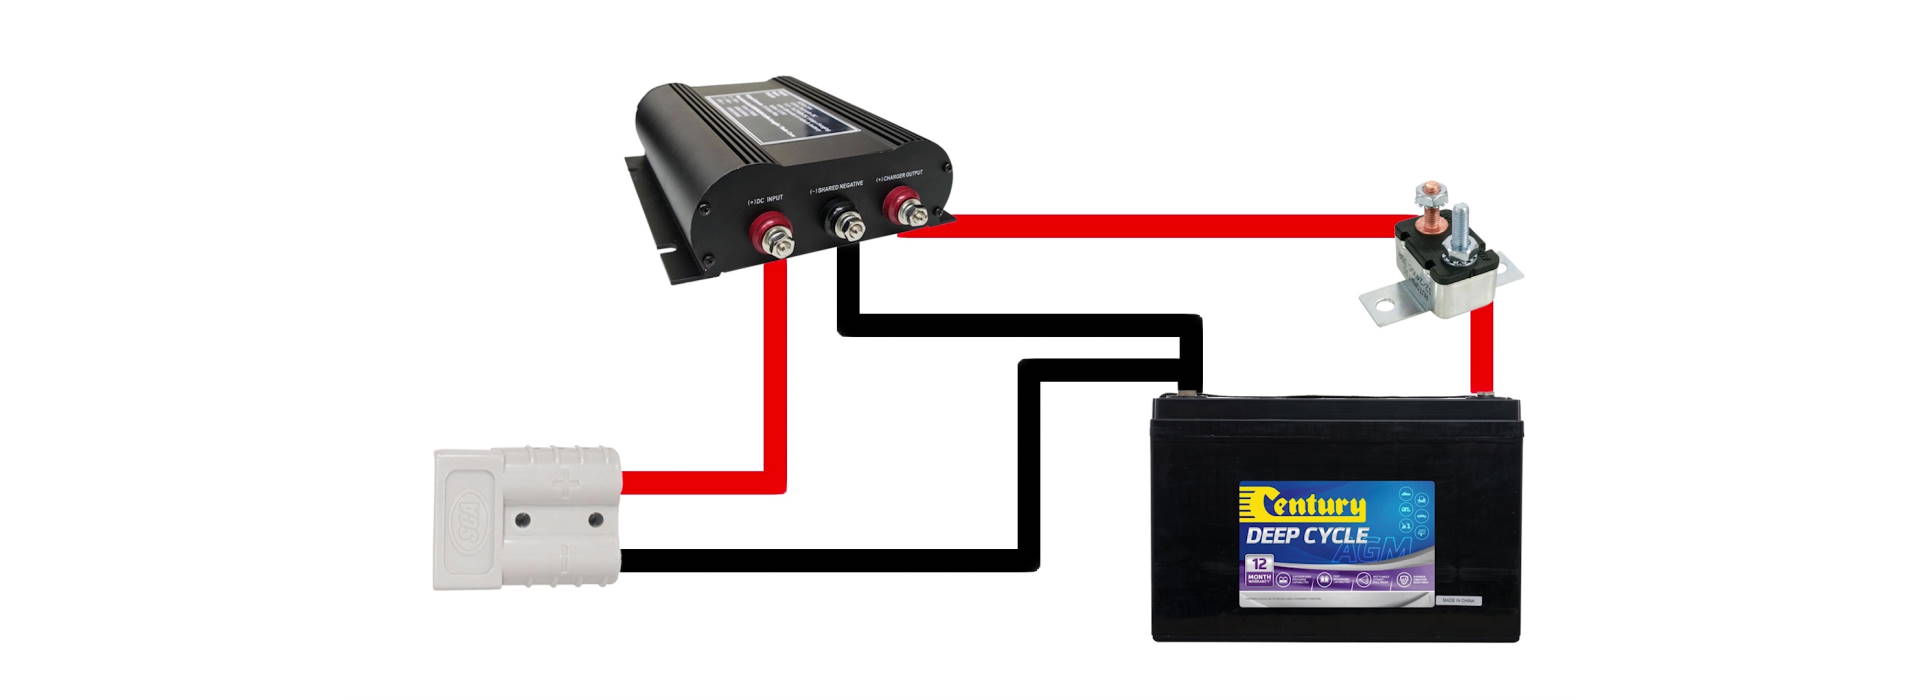
You’ll need to fit a fuse or circuit breaker according to the requirements of your DC charger – right here at the positive terminal of your main battery. Use a lug crimper to install some battery terminals for the positive and negative cables – but don’t connect them yet. Now wrap the entire length of the cable in corrugated split tubing for protection.
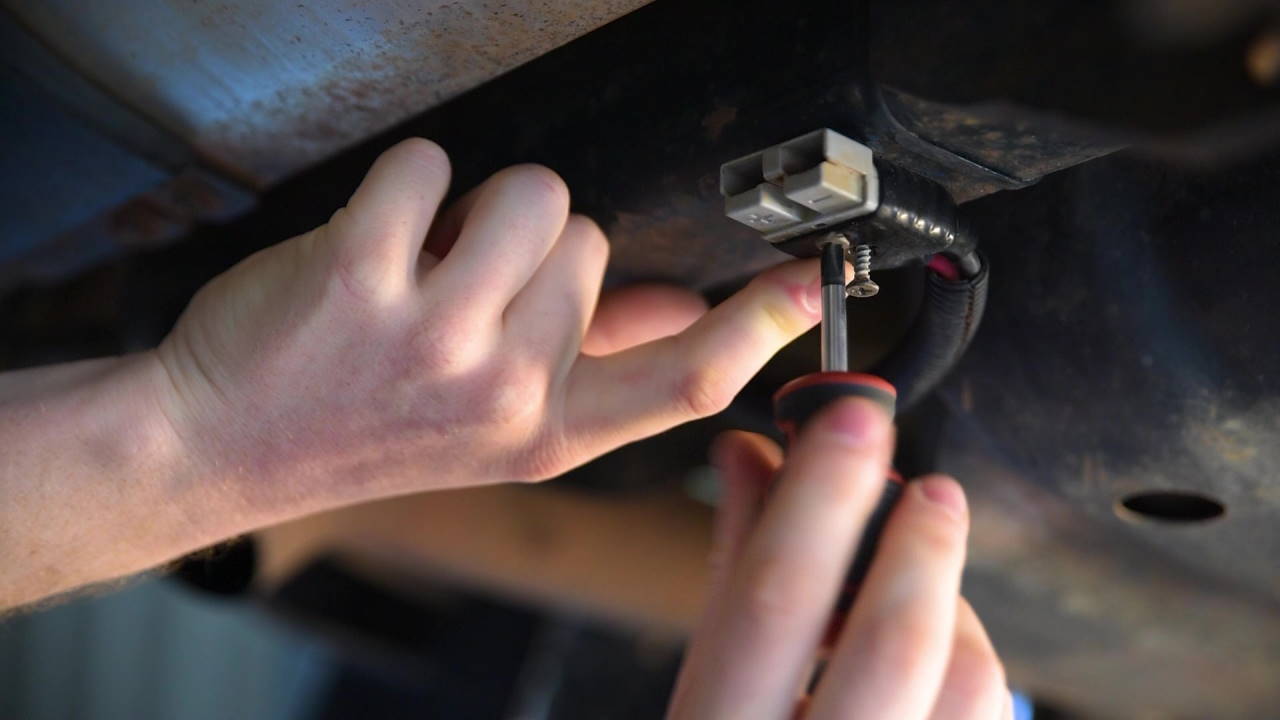
This cable must run to the back of the vehicle near the trailer plug, so follow the chassis rail along and use plenty of cable ties to secure it. Then fix the Anderson plug where suitable. Another Anderson plug and cable is needed for power and earth along the trailer drawbar; and up to the charger.
What else do I need for the install?
Solder, or use a crimp joiner – to attach this positive feed to the alternator input on your DC charger. Run the earth cable from the Anderson plug to the new auxiliary battery so that the entire system shares a common earth. The earth cable from your DC charger should also attach straight to the battery negative.
It is wise to leave battery terminals disconnected throughout your install, to prevent short circuits. Make sure all cable terminals are crimped tightly with a lug crimper. Cable joins at a DC charger can be soldered or crimped - and covered with heat shrink. Check out our how to solder guide - and do it like a pro.

The output from your charger will hook up to your new trailer battery, through another fuse or circuit breaker as specified by the instructions for your charger.
Last of all, consider how your charger is activated. This can be via ignition feed; or triggered at a certain input voltage level. Refer to the instructions with your DC charger to decide on the best method for you.
*Important information* - Click here to read more about our How-To terms and conditions.