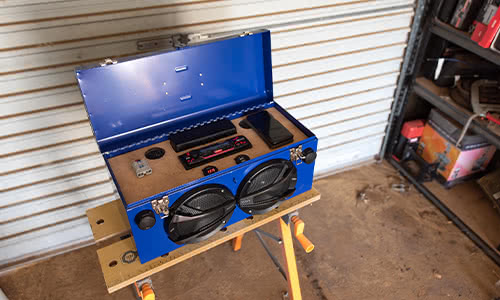
Everyone these days hauls around a little Bluetooth speaker for parties, hanging in the shed with mates, or relaxing at camp with their favourite tunes. They sound good, but don’t you want something a little bit special? Something that packs some more punch? Something that you built yourself? If you answered yes to all those questions, this is THE project for you!
Most of the parts for this project can be purchased at Supercheap Auto, with the exception of the timber and plywood, which we scavenged from the back of the shed. It’s based around a car stereo setup, using a basic media deck head unit, some powerful 6.5 inch component speakers, and a series of 12 volt batteries to keep it running for hours on end.
Okay, lets get into it!
Parts You'll Need
- A toolbox. We chose this one
- A media head unit. Choose one without a CD player if possible
- A set of speakers. 6.5 inch fit well in the toolbox. We used these ones (the bass and volume
is incredible!)
- 12 volt AGM batteries
- 4MM automotive cable in black, and red. The 4 metre roll is plenty
- A toggle switch
- Inline blade fuse holder, and fuses to suit
- Twin USB power socket (for optional extra device charging)
- 12v digital voltage readout
- An Anderson plug
- 1 metre each of red and black 3mm wire
- A selection of female blade terminals
- Electrical tape
- Solder
- Self-tapping metal screws, and possibly some wood screws as well
- A piece of plywood at least as large as your toolbox
- Further wood scraps are handy too
Tools You’ll Need:
Lets Talk About Choosing Your Parts in Store
We spent a bit of time measuring up speakers, head units and batteries for this project to make sure it would all fit. So if you’d rather not mess around measuring up different brands and sizes, just grab the same components we used from the links in the parts list.
If you’d rather choose yourself; here’s a few points to consider.
- Avoid CD player head units if possible. Most of the time you won’t use CDs, and the units are physically larger and therefor may not fit
- Spend the money on a good pair of component speakers if you want exceptional volume and bass. Also, try and match your speaker and head unit brands, as manufacturers often tune settings into their products so they work well together
- Fit as many batteries as you can afford and have space for. Make sure they are AGM so as there’s no concern of gassing or leaking. And remember, you can chain multiple batteries together to obtain a longer run time from the same voltage
Okay, lets build this thing!
Mounting the Speakers
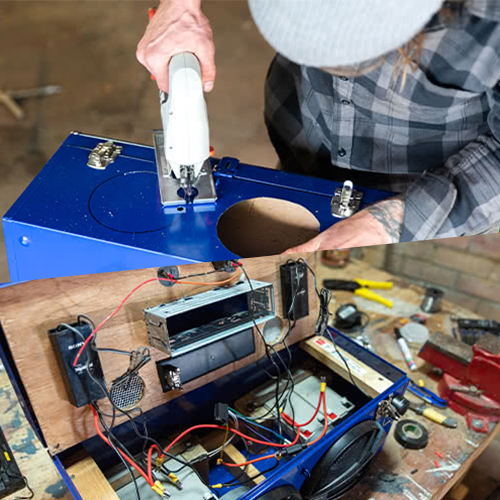
On the back of your speaker packaging should be a perforated template you can just pop out, and use to measure up the toolbox ready to be cut. The 6.5 inch speakers will fit snug between the latches on the toolbox, with the tweeters towards the outside edges. To make the cuts, first drill a hole right near the edge of the marked circle, then equip your jigsaw with the metal blade and slip this through the hole. You might want to put some masking tape over the base of your jigsaw or around the toolbox to prevent scratching.
Once the holes are cut, mark and drill holes for the screws, and mount your speakers to the toolbox. For the tweeters, mark and drill two holes for each tweeter, one for the bolt, and the other to poke the wire through.
Mounting the head unit
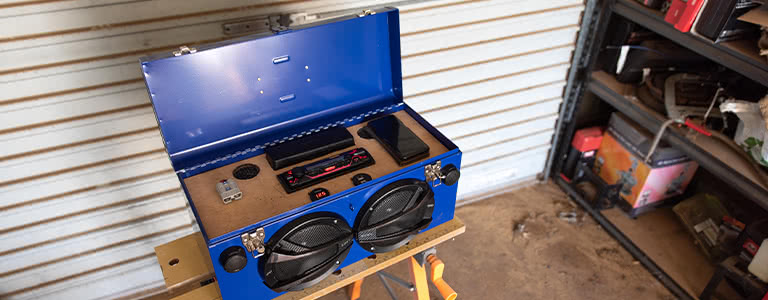
Remove the top shelf supplied with the toolbox. The small steel ledges which this used to rest on are an excellent mounting point for a plywood fascia! We just measured up the inside of the toolbox, cut a piece of plywood to this size, and it rests perfectly on the ledge.
However, due to the size of the speakers, you’ll need to space it up 20mm or so. Two scraps of 20mm thick timber screwed into the ledge gave us the perfect height.
Most head units come in the box with a universal mounting bracket. Slip this off the unit, and use it to mark the plywood for cutting. Mark it dead centre on the plywood, then use the jigsaw equipped with the wood blade to cut out a hole just as you did with the speakers. Then pop the mounting bracket into the hole, and bend the tabs on the back to lock it in place.

Fitting the Volt Meter, USB Ports & a Charging Plug
While you’re working with the plywood fascia, you may as well get everything else mounted up too. On the underside, screw in the crossover boxes for both left and right hand side speakers (only if you’re using component speakers). Up top, drill a hole for wires to come through for the Anderson plug. This will be the charge port. Also fit up your USB plug, volt meter, and the toggle switch.
We got REALLY creative and glued the storage box for the head unit fascia into another cut-out we made. This is where we’ve housed the toggle switch, charge cables and accessories.
Finally, you should create a couple of port holes somewhere here for the speakers. We had some mesh lying around which we trimmed to size, just to neaten up these holes a little.
Installing the batteries
This proved to be the most challenging part of the build, how do you mount these up without having bolt heads and screw holes poking through the bottom of the box? The solution here was a wooden battery mounting frame knocked up with some more scrap timber. This consists of four pieces of timber cut to the same height as the batteries, with a piece of timber screwed between the two battery banks. The timber is fixed to the toolbox at all points of contact with liquid nails, and left to dry overnight. They won’t come free with anything short of a prybar!
Then, to hold the batteries down in place, a couple of steel straps cut to length with the jigsaw, and screwed into the wooden frame. With the plywood fascia in place, the head unit sits perfectly between the battery banks.

Wiring It All Up
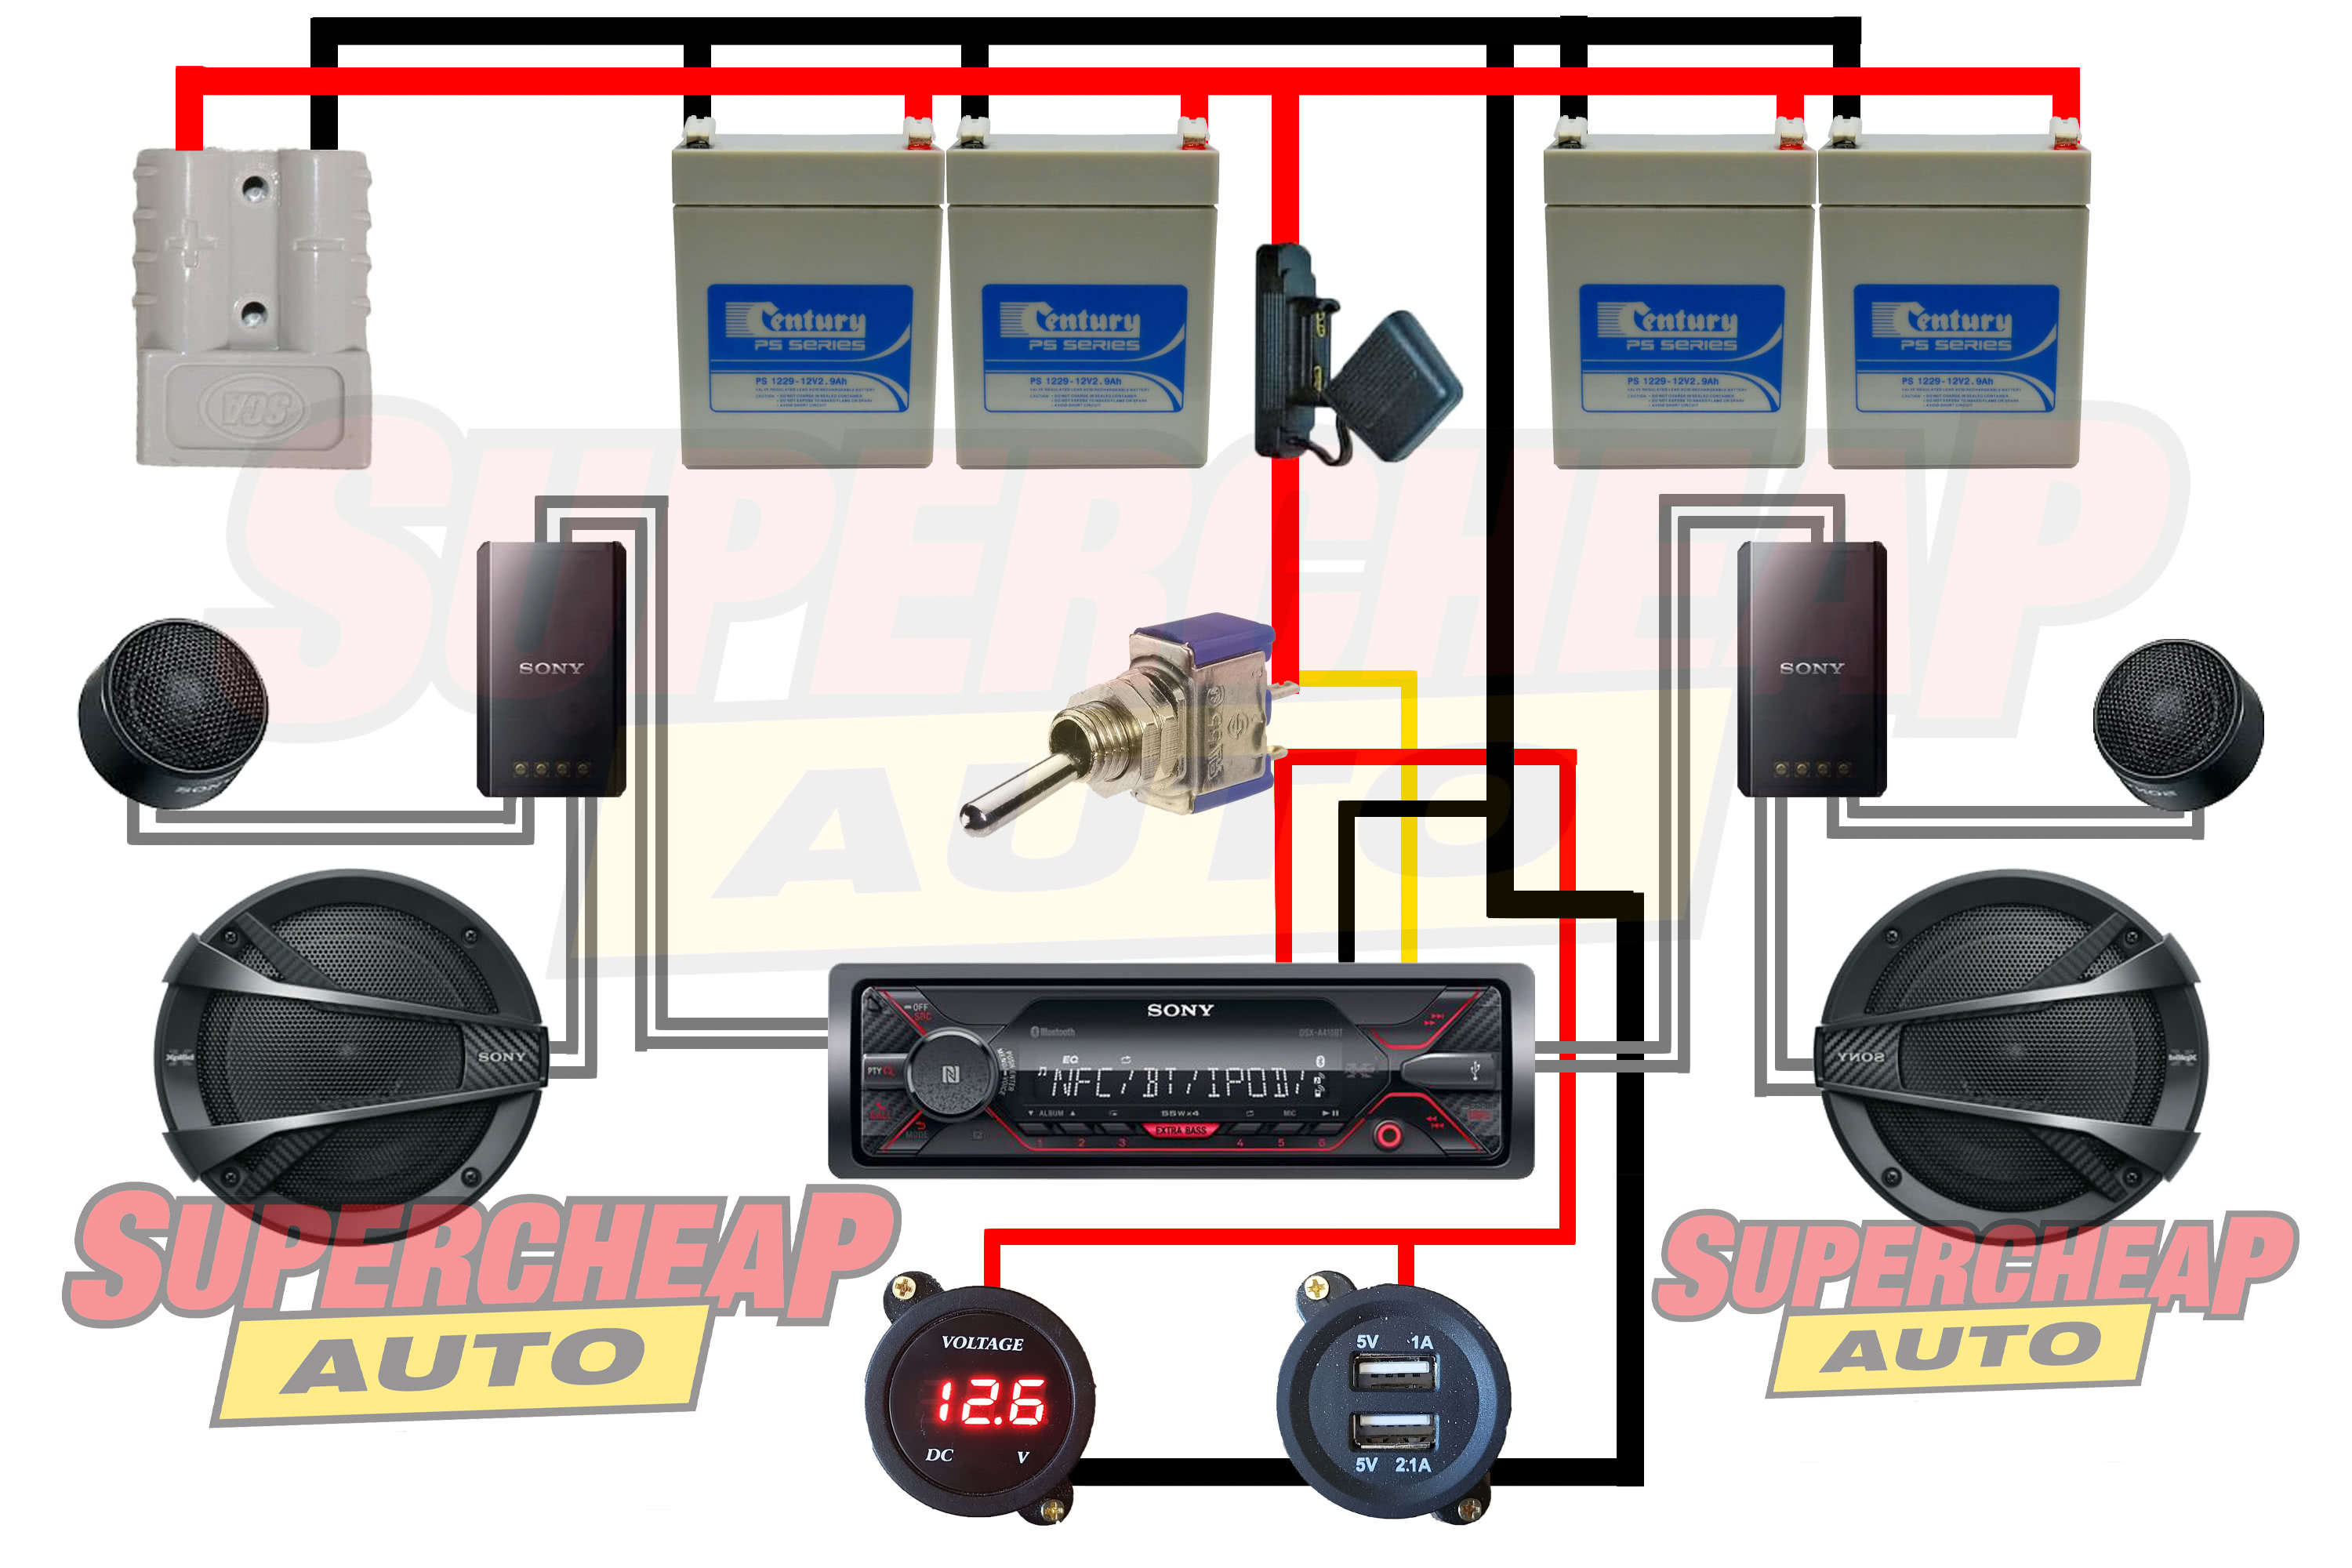
Words won’t go too far to explain the wiring, so here’s a diagram to help make sense of it:
Daisy chaining all the positive terminals together, and all of the negative terminals together will keep the system at 12 volts while increasing your run time. So the four 7 amp hour batteries now behave like one large 28 amp hour battery. This is connected directly to the Anderson plug for charging.
Power for the head unit, volt meter and USB outlets is through the toggle switch. Power to the toggle switch can be taken off anywhere along the positive cable between the batteries, and your blade fuse holder must be fitted here.
The yellow wire from the head unit is connected directly to the batteries and not through the switch; so that when power is switched off, the head unit will retain memory for EQ and Bluetooth settings.
The red wire into the head unit is the main power supply, so this is connected to the switch. The volt meter and USB can be run from the same switch using the 3mm wire.
Every item in your circuit will need an earth back to your battery bank. For this, just use a length of the 4mm black wire and daisy chain it across the negative terminals on each the voltmeter and USB sockets, and the black wire from the back of your head unit.
Finally, the speakers. A head unit has output for the 4 speakers usually found in a car, so we used only the two front outputs. Refer to the instructions for your head unit to determine the correct wiring colours, and connect these to your speakers or component splitter.
Finishing Touches & the Test Run!
If you were to just whack a pair of speakers into a metal toolbox and crank it, the rattles and tinny sound would be awful! Thankfully, the battery bank and plywood fascia give the toolbox a lot of mass to deaden the sound. If you want the BEST sound quality, apply some sound deadner to any large metal areas.
Run an eye over the wiring, make sure everything is connected as it should be, with no positive and negative cables coming into contact; then pop in a 10 amp blade fuse and flick the switch. Your volt meter should display the battery voltage, the head unit will come to life; and the USB outlets will charge connected devices.
Congratulations! You did it!
If everything powers up as it should, you can screw the plywood fascia into place (or give it a coat of paint first if you like) and crank your favourite tunes. With a quality set of speakers, this thing will out-perform any portable Bluetooth speaker by a long shot! For best battery life, charge the boombox when it reaches 50% charge which is approximately 12.4 volts. This can be done with a standard car battery charger run through an Anderson plug adaptor, or even a regulated solar panel at the campsite, where you’ll never worry about running out of tunes!


*Important information* - Click here to read more about our How-To terms and conditions.